This article is a guide to different ways of preserving food at home. It will briefly cover some of the best methods and how they work. Of course as survivalists, having food that can last in event of a crisis is essential. If you have not given serious thought to food preservation, you should start right now, especially if you plan on hunting, fishing or growing your own food. The need for nourishment is perhaps only second to the need for water.
Table of Contents:
Freeze Drying
Imagine if you could prepare an emergency food supply that would last over 30 years without spoiling. Even better, imagine if you could store this food at room temperature, pretty much anywhere, without intricate storage equipment. And lastly, imagine if this form of food storage was actually smaller and lighter than regular food, and could be prepared very cheaply with minimal time investment.
Well, good news friends! This technology already exists. It is called freeze drying (or lyophilisation or cryodesiccation, depending in how big of a nerd you are talking to).
This is the Cadillac of preserving food. Freeze dried food can be stored for decades at room temperature, and only needs water to be restored to its original form.
How Freeze Drying Works
Freeze drying was first invented during World War II. The allies would ship serum to the front lines to help soldiers wounded in battle. However, due to the lack of refrigeration technology available at the time, it would often spoil by the time it reached its destination. Freeze drying was invented to solve this problem.
The process of freeze drying works like this: First, the food (or serum, in the above case) is flash frozen (frozen quickly at very low temperatures, so the ice doesn’t form large crystals and damage the cells of the food). Then the moisture from the food is removed through the process of sublimation (going from solid ice directly to vapor), often with the help of a vacuum chamber. Once all the moisture is removed, the food is placed in air-and-moisture-proofed bags, and stored. The food will return to its original form- with its taste, texture and nutrients still intact, even decades later- by just adding boiling water.
How to Freeze Dry at Home
1) Freeze Drying with a Vacuum Chamber
The quickest and most effective method of freeze drying is with a vacuum chamber. After the food is frozen, it is put in the vacuum chamber at a pump level below 133 x 10-3. The vacuum environment will cause the sublimation process to happen much quicker, and you’ll be able to prepare more food in less time. When fully sublimated, the food is ready for storage.
2) Freeze Drying with a Freezer
If a vacuum chamber isn’t available to you, though, you can still freeze dry. You just need more time. You can cut the food into small pieces and place them on a perforated tray in the freezer (This process works much better in non-frost freezers). The food will freeze in the first few hours, and over the next week the process of sublimation should take place (all the moisture will be removed). You can test the food by taking a piece out and letting it thaw. If it turns black quickly, it isn’t ready. If not, you’re ready for the next step, storage.
3) Freeze Drying with Dry Ice
There’s a third way to freeze dry, and that’s by using dry ice. In a low humidity environment, water molecules are drawn out of a material. Surrounding the food you want to freeze dry with dry ice (CO2 in it’s solid state), will create a near-zero humidity environment, drawing out the moisture very efficiently.
You’ll need a container twice the size of the amount of food you’re going to freeze dry (Tupperware is fine for your container). Poke a few holes on the lid for the gas to escape. Put equal volumes of dry ice and the food you’d like to freeze dry into the container. One layer of dry ice, one layer of food, etc. works well. Put the container in the freezer, to keep the dry ice solid for as long as possible. Check every 24 hours until the dry ice is gone. The food should be fully freeze dried, and ready for storage.
Storing Freeze Dried Food
After freeze drying, either with a vacuum chamber or not, place the food in air tight, moisture proof bags. You can use a vacuum packing machine for this if one is available to you. Ziploc bags also work fine, as long as the air is pushed out of them. Seal them up and place them in your area of storage. You now have freeze-dried food, and emergency food supply that will be good for decades!
What to Freeze Dry?
There are many foods you can attempt to freeze dry. Fruits and vegetables work really well. Apples and potatoes are great to start with as they’re the easiest. I’ve even heard of freeze dried ice cream. One thing to remember is that water is the only substance that sublimates, so while you may remove all the water moisture some alcohols and acids can still affect the storage and chemical stability of your food. Occasionally test your freeze dried food to make sure it has transformed effectively and will be of use to you should the day come when you actually need it.
Dehydrating Food
Dehydrating (or drying) is the process of removing the moisture from the food, inhibiting the growth of microorganisms and allowing the food to last longer. Drying food has been around since ancient times, but modern technology such as ovens or electric food dehydrators can greatly speed up the process.
Dehydrating Meats
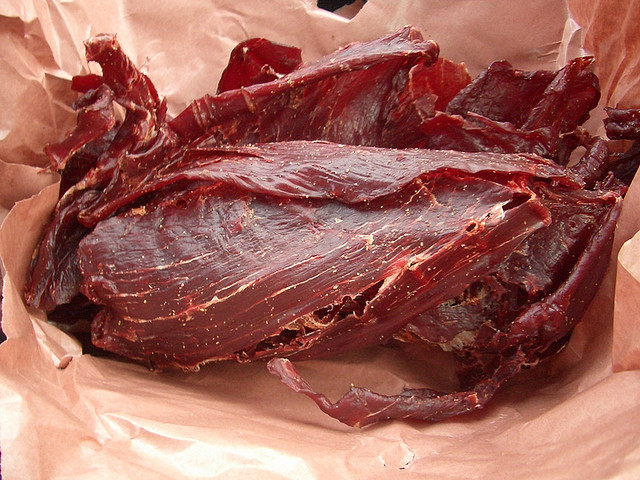
This section applies to dehydrating meats. The advice applies for chicken, turkey, beef (roast works well) or most other meats you could think of.
What you will need:
- A kitchen, with an oven and fridge
- 2lb of meat
- A knife
- Tongs
- A bowl
- Marinating sauce
- Plastic wrap
- A pot or sauce pan
- Paper towel
- An air tight container or Ziploc bags
Step 1
First, you’ll want about 2lb of meat. The leaner the cut, the longer your meat will last. You must cut your meat into strips, as thin as possible (consider getting your meat from the deli and getting them cut into 1/16ths of an inch). Trim off any fat, as it will go rancid and spoil your meat quicker.
Step 2
Place your meet strips in bowl, and add a marinating sauce. Olive oil and salt is an idea. Soy sauce, Worcestershire sauce, salt, pepper and garlic is another (you can experiment with seasoning as you become more experienced). Cover the bowl with plastic wrap, place in the fridge and let it marinate for 2 hours.
Step 3
Put your meat and sauce into a pot. Turn a stove burner on high, and boil for 5 minutes to kill any bacteria. When finished, place your meat on paper towel to let them drain.
Step 4
Open your oven and place the strips onto the oven racks (This will maximize air flow). Set your oven 160F (as low as possible while still ensuring bacteria are killed). Keep the over door open an inch or two to encourage air flow. It should take 6-12 hrs for all the moisture to be removed. You will know when the meat starts to crack. It’s important that all moisture is removed, as this is where bacteria will grow.
Step 5
Allow meat to cool completely.
Store your jerky in an airtight container of some kind, or in Ziploc bags. This will prolong its shelf life. It will be good for 2-4 weeks when kept at room temperature, and if you freeze it, it can last for over 6 months.
If you choose to rehydrate your meat, place it in Tupperware with water. Seal the top and let it sit in the fridge for a few hours.
Dehydrating Fish
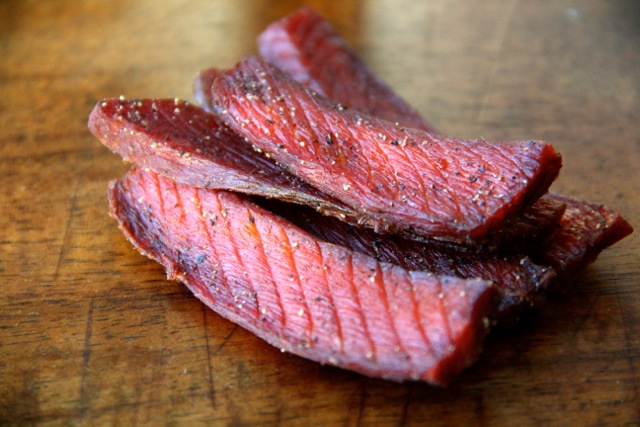
As with meats, the higher the fat the quicker your meat will spoil. With fish, fat is distributed more evenly, and is much harder to remove during preparation. You’re best option is to go with a low-fat kind of fish and avoid fish with a higher fat content.
Some low-fat fish: cod, founder, haddock, halibut, sea bass, sea herring, sea trout, snapper and yellow perch.
Some high-fat fish: cat fish, mackerel, rainbow trout, salmon, shark, tuna.
It’s not inherently bad to use high-fat fish, if those are what you enjoy then that’s fine. Just remember they will have a shorter shelf life.
What You Will Need:
- A kitchen, with an oven and fridge
- Your fish (1-2lb)
- A bowl
- Salt
- Seasoning
- A knife
- Tongs
- A bowl
- Airtight containers or Ziploc bags
Step 1
Cut your fish into thin strips, about ½ and inch, in even slices.
Step 2
Create a mixture of water and salt at a 2:1 ratio in your bowl. Place your fish in the bowl and let marinate for 30 minutes.
Step 3
Rinse the fish off, and dry with a paper towel.
Step 4
Add salt and whatever seasoning you would like to the fish. Store in an airtight container, and refrigerate overnight.
Step 5
Put your fish onto an oven tray. Let them dry in the oven for 6-12 hrs at 150F. You’ll know when they’re ready when you can squeeze the fish and it won’t crumble.
Step 6
Let the fish cool completely.
Store them in air tight containers or Ziploc bags, in a cool, dry place.
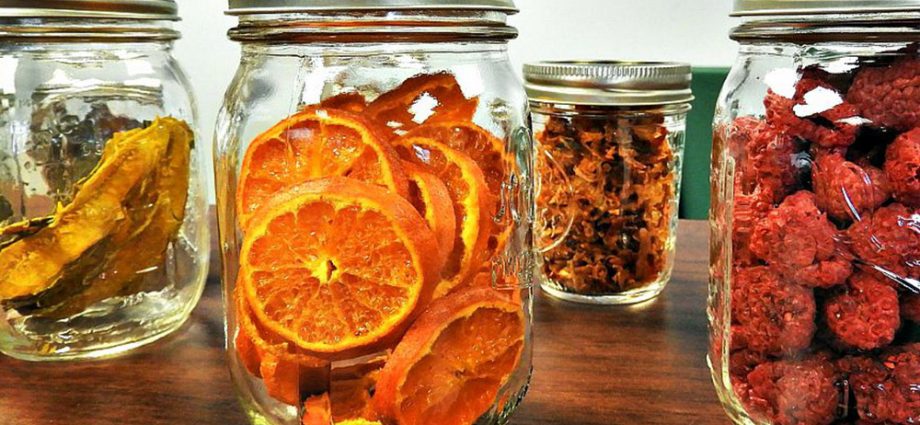
Dehydrating Fruits and Vegetables at Home
Dehydration is one of the oldest methods of food preservation. It’s an easy process that leaves you with long-lasting food that’s easy to store, and retains most of the good stuff found in fruits and veggies.
The Benefits of Dehydration
Removing all moisture from food allows it to last for much longer, since water is necessary for bacteria to survive and for the decomposition process to take hold. It also allows the food to be stored at room temperature, not needing refrigeration like you do for most regular foods. Removing moisture from fruit and vegetables drastically reduces the weight of and the space they take up- usually reducing weight by 80-90%. And lastly, most of the vitamins and minerals, fiber and anti-oxidants in the food are retained (you will lose most of the vitamin C, though).
How to Dehydrate Fruits and Vegetables
1) Blanch your fruits and vegetables. Put them in boiling water for 4-5 minutes, and then run them under cold water. This will help stop enzymes from acting and kill microorganisms. Adding some lemon juice to the water will help the process.
2) Select your fruit and vegetables. The closer they are to peak ripeness, the better your outcome will be. Cut them into 1/4” to 1/8” slices, the thinner the better. Think of it as making fruit and veggie chips.
3) Preheat your oven to around 140 F.
4) Place your slices onto a tray- stainless steel wire mesh works best, to maximize airflow.
5) Place your tray in the oven. Keep your oven door open a few inches during the process, to increase airflow and allow the moisture to escape.
6) Maintain a constant temperature of around 140 F during the whole process. Remember to move your trays around from time to time, as heat isn’t uniform within the oven.
7) It will take 5-15 hrs for the fruit or veggies to dehydrate, depending on the type. You can test by pressing your finger in- if there’s any moisture on your finger, it isn’t ready yet. Each fruit or vegetable reacts differently to dehydration- some will get brittle, some will get pliable, and some will get hard.
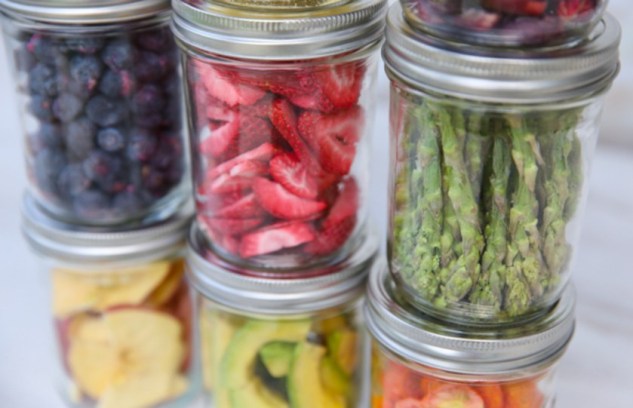
8) Store in air-tight, moisture-free containers, such as Ziploc bags or jars. Your dehydrated fruits and vegetables can be stored at room temperature and don’t need to be refrigerated.
Some Notes on Fruit
Most fruits can be dehydrated, but some of the easiest kinds are apples, cherries, peaches, bananas, apricots, pineapples, pears and strawberries.
A few extra notes on specific fruits:
Citrus
Citrus fruits, such as oranges, lemons and limes, get very brittle when dehydrated. If you put them in a blender, it will make a powder great for sprinkling.
Apples
Remember to peel them and remove the cores first. They are one of the easiest fruits to rehydrate.
Bananas
These may require longer to dehydrate, but in the end you’ll be left with a delicous snack- banana chips!
Blueberries
Dip in boiling water until their skin cracks. This helps with the dehydration process.
Grapes
These will leave you with the most common form of dehydrated food- raisins! Making your own will leave you with larger and better tasting raisins than the kind found in stores.
Some Notes on Vegetables
some of the easiest veggies to dehydrate are potatoes, carrots, corn, zucchini, beans, beets, broccoli, mushrooms, onion, peppers, and cauliflower.
A few extra notes on specific vegetables:
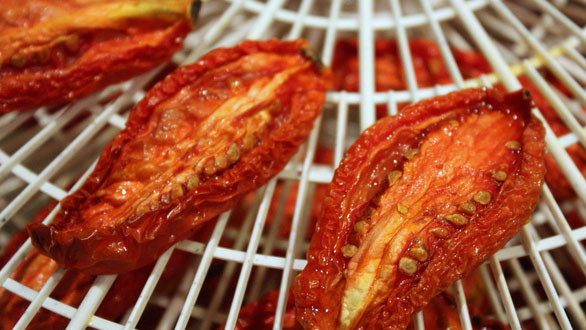
Tomatoes
Make sure to boil and peel them before starting the dehydration process.
Mushrooms
Don’t wash with water before dehydrating (it will just absorb the water, and make the process take longer). Mushrooms take less time and less heat to dehydrate- put them in for around 3 hrs at 90 F to get the job done.
You can later rehydrate your fruits and vegetables by letting them soak in water for 30 to 90 minutes.
Canning and Preserving Fruit
First, a word on the different styles of preparing fruit for canning you can use.
Preparing The Fruit
There are a few different ways to prepare fruit before canning.
Cold Pack: here raw, cold fruit is packed into jars, covered n hot syrup, then processed in the oven, steam bath or pressure cooker.
Hot Pack: here fruit is precooked in boiling syrup, then packed. This method is recommended for fruits that are prone to shrinkage in the jar, such as peaches, pears, apples strawberries and cherries. Hot packing will minimize this shrinkage.
Open Kettle: here fruits are simmered in boiling syrup until they are tender. Jars are filled to an overflow and closed tightly.
Pressure Cooking: here the fruit is cooked in a pressure cooker. Directions for canning in a pressure cooker are included in each manufacture’s recipe book.
Okay, let’s begin!
What You Will Need:
Kitchen Equipment
1) Preserving kettles and pots
2) 2 wide neck funnels
3) Long-handled metal spoons
4) Measuring cups
5) Preserving jars, lids, rings & screw tops, OR tins and a canning machine
6) (if hot bath canning) A boiler rack with handles and a thermometer
7) (if pressure canning) A pressure cooker
Ingredients:
1) Enough fruit to fill the desired jars/cans
2) White sugar
How to do it:
This section is split into two parts: making the syrup, and then canning the fruit.
Making the Syrup
First, you need to decide how thick you want the syrup to be.
Very thin: 1 cup white sugar, 2 cups water (makes 2.5 cups of syrup)
Thin: 1 cup white sugar, 1 cup water (makes 1.5 cups)
Medium: 1.5 cups white sugar, 1 cup of water (makes 1.75 cups)
Heavy: 2 cups of white sugar, 1 cup of water (makes 2 cups)
Boil the sugar and water for 5 minutes. Make sure to have .75-1 cup of syrup for each pint jar.
Canning the Fruit
1) Sterilize the jars and cans by placing them on an oven rack at a temperature of 350 F for 30 minutes.
2) Prepare the syrup outlined above.
3) Prepare the fruit by blanching, peeling or wiping.
4) Sterilize glass tops and rubber rings with boiling water.
5) Put the rubber rings onto the jars now to prevent any fruit or syrup getting between them and the jar.
6) Fill the jars with the fruit that has been prepared.
7) Fill the jars with syrup, leaving ¼ inch of space at the top (except for in the open kettle method).
8) Seal tightly immediately.
9) Turn the jars/cans upside down, and leave for 24 hrs to test for leaks. If any fluid leaks out, the fruit should be reprocessed.
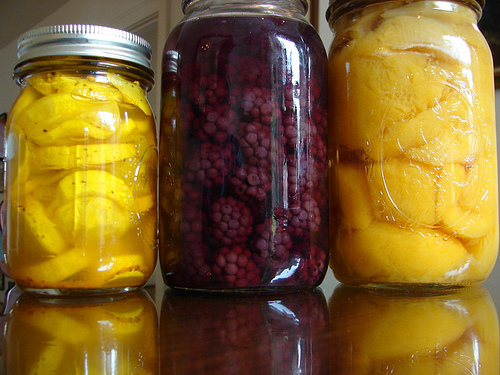
Congratulations, you now have canned fruit ready to go!
Canning and Preserving Blueberries and Raspberries

This is a guide to canning blueberries and raspberries. The processes are a little different than canning fruit.
Canned Blueberries
What You Will need:
Kitchen Stuff:
1) Preserving kettle
2) Jars or cans that can be sealed
Ingredients:
1) 6 quarts of blueberries
2) 4 cups of sugar
3) 0.25 teaspoon of salt
4) 1 tbsp lemon juice
How to do it:
1) Sterilize the jars or cans by placing them on an oven rack at a temperature of 350 F for 30 minutes.
2) Wash the blueberries. Put them in the preserving kettle with 1.5 cups of water and the salt.
3) Put the cover on the kettle and let simmer gently for 5 minutes.
4) Add the lemon juice and sugar.
5) Bring the water to a boil again and let simmer for 3 minutes.
6) Use the contents of the pot to fill the sterile jars to an overflow, and then seal the lids quickly.
7) Place jars/cans upside down to look for leaks. If any fluid leaks out, you will need to reprocess the fruit.
This should yield you 7 pints of preserved blueberries.
Oven-Canned Raspberries
What You Will Need:
Kitchen Stuff:
1) A saucepan
2) Jars or cans that can be sealed
Ingredients:
1) 6 quarts of raspberries
2) White sugar
How to do it:
1) Sterilize the jars or cans by placing them on an oven rack at a temperature of 350 F for 30 minutes.
2) Wash the raspberries. Pack them into the sterile jars. Tap on the jar to help the fruit settle.
3) Place the jars on the oven racks and heat to 300 F. Make sure the jars don’t touch. The juice will start to draw out from the fruit during heating.
4) After 20 minutes, mix 6 cups of water and 3 cups of sugar in the saucepan. Simmer for 5 minutes.
5) After the jars have been in the oven for about 5 minutes, remove them.
6) Fill the jars to overflow with the boiling sugar/water syrup.
7) Quickly seal jars/cans tightly.
8) Place jars/cans upside down to look for leaks. If any fluid leaks out, you will need to reprocess the fruit.
